Published at 14th Jul 2020
Modified at 22nd Feb 2021
How To Make A Coin Necklace: A Complete Tutorial
 Since the beginning of time, men and women have worn coin jewelry to signal their social status and wealth. The styles of jewelry may differ from culture to culture, but the presence of coins as decoration has been consistent. Want to add a touch of nobility to your look? Why not learn how to make a coin necklace?
In the Victorian Era, sailors gifted their sweethearts engraved coins to remember them by before embarking on dangerous voyages. In this time before voicemail, text messages, and social media, these love tokens—common coins engraved with sentimental messages—offered long-distance couples tangible reminders of their bond.
Today, many people consider it good luck to carry a coin from the year you were born. Alternatively, you can choose a milestone date such as a graduation or marriage. Feeling generous? Why not give coins to friends or loved ones from significant years in their lives.
Want to get in on this trend? Don’t worry, you don’t have to date a sailor or spend a ton of money to learn how to make a coin necklace. There are two methods, and we’ll cover each in depth below. Keep reading as we walk you through the process of creating your very own coin necklace. But first, head over to our coin website and find something special.
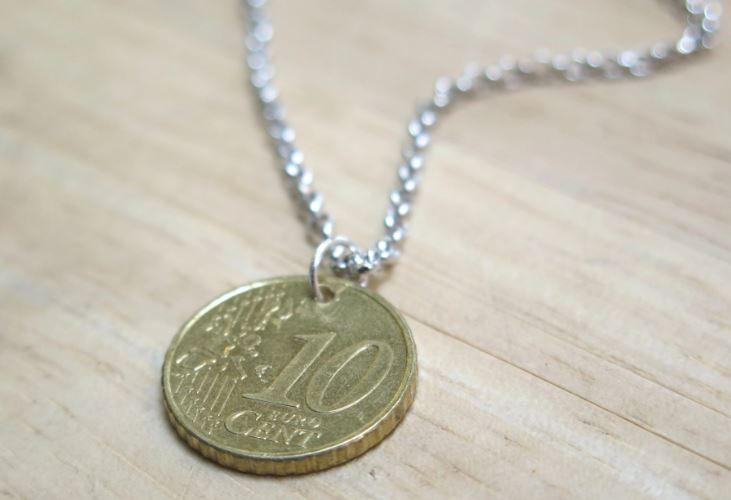
Method #1: How To Make A Coin Necklace Pendant
If you've recently traveled to a foreign country and brought back some of the currency with you, this is a great way to create a memento. Have you been bitten by the travel bug? Start with one coin, and add another for every trip you take! In a few years, you'll have a beautiful piece of jewelry that serves as a storybook for your world travels.

Tools Needed
Your coin of choice
Electric drill with a slim bit
A jump ring
Needle-nose pliers
Chain or ribbon to hang the finished pendant
A block of wood or metal
Strong tape, like Duct of Gaff tape
Steps To Make A Coin Necklace
Step 1: Lay the piece of wood or metal on a flat surface. This will act as a barrier and protect your countertop or worktable from the drill bit.
Step 2: Decide what side of the coin you want to display. Most coins are designed with two faces, so choose the side you want to face right side up, because the backside may face upside down when you turn it.
Step 3: Once you've decided, lay the coin on the block with the side you want showing facing you.
Step 4: Fasten the bottom half of the coin down with a piece of the tape to prevent it from moving around or slipping once you start drilling.
Step 5: Once your coin is secured, it's time to drill your hole! Don't worry, it's not illegal to drill a hole in currency. It goes without saying, but if you try to use it to pay for something after you've drilled, then you may become an outlaw. Instead, keep this pendant on your necklace for show, not to pay for your coffee.
Step 6: Line the drill bit up with the top-center of the coin, and go for it! Press down firmly but gently and keep drilling until you feel the bit hit wood.
Step 7: Use the needle-nose pliers and open the jump ring. Slip it through the newly-drilled hole in your coin, then squeeze it shut. If you don't want to purchase a jump ring, you can steal one from an old necklace you won't use anymore. Recycle, reduce, reuse!
Step 8: Slide the chain or ribbon through the jump ring. That’s it, you’re done! You've got your very own custom made coin necklace for a fraction of the cost you’d pay at a jeweler.
Now that you’ve made a classic coin necklace pendant, ready to add another to your collection?
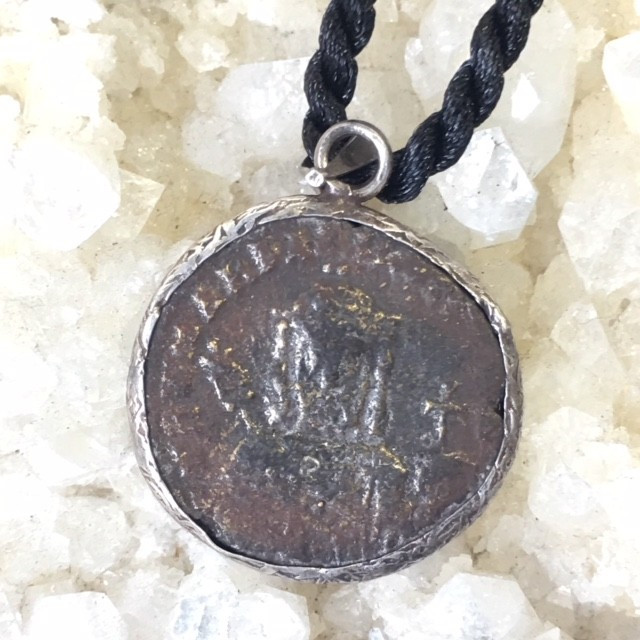
Method #2: How To Make A Bezel Coin Pendant
If you don't want to drill into federal currency, but you still want to look fashionable, then this tutorial is for you. You can create a lovely coin pendant without drilling a hole in anything.
Tools Needed
Your coin of choice
A pendant bezel
A tiny screwdriver. Some bezels don't have screws and are opened and closed by bending them. If you have one of these bezels, then there is no need for the screwdriver.
A necklace chain or ribbon to hang the pendant
Steps To Make A Bezel Coin Pendant
Step 1: If you have a screw-close bezel, then pick up your screwdriver in one hand and hold the bezel in the other. Gently unscrew the top until the tiny screw comes loose. Put it somewhere safe. Bezel screws are so small that if it rolls onto the floor, there's likely a small chance of relocating it from the abyss of the carpet or rug.
Step 2: Open the bezel just enough to fit the coin into the opening. Gently pull the sides of the bezel away from each other, do not twist them apart. Otherwise, the metal will bend, and the bezel won't retain its original shape.
Step 3: Close the bezel, and screw the clasp back into place. If your coin feels loose and you're worried about it falling out of the pendant, no worries. Just re-open the bezel and put a little super glue or epoxy along the side of your coin before putting it back into place.
Step 4: String the ribbon or chain through the pendant, and you’re done. No electric tools, no drilling, and no mess.
This method is also excellent if you're a coin collector and have some valuable pieces of your collection that you want to show off. If you don't glue the coins into the bezel, you can swap them out whenever you want to change your style up.

Start Flaunting Your Coin!
Coin jewelry has endured through the Pharaohs of ancient Egypt, Victorian England, and still carries on through the modern-day. It's safe to say this trend isn't going out of style any time soon!
And now you’re on your way to flaunting the trend yourself. With these tools and instructions in tow, you've got everything you need to create as many fabulous pieces you want!
SHOP FOR COINSSearch the Fashion Encyclopedia
Related Auctions
Related Articles
How to Buy Jewelry on the Internet. There are so many types of beads. It will be up to you to determine where you want to start, all authentic gemstone beads or if you will also use glass beads ‘man made’ as well as gold and silver beading. You
10th Apr 2019
How to buy a ruby for your ring or pendant,Make sure that you learn as much as you can about Rubies, prior to buying a ring or a setting that you are going to add Rubies to. Like Diamonds, Rubies can be flawed, and imperfect The Ruby is one of the most b
10th Apr 2019
Latest Articles
Titanium is a popular jewelry metal known for being lightweight, durable, and affordable. Learn all about titanium, how it compares to similar metals, and the pros and cons of titanium jewelry.
7th Feb 2023
Learn all about tungsten jewelry - from its history and uses to its durability and care. By the end of our guide, you’ll know if tungsten is right for you!
7th Feb 2023
Thinking about adding some timeless white gold jewelry to your fine accessories collection? Here’s all there is to know about sophisticated white gold!
29th Jan 2023


